
Later today, I’ll be off to The Ropewalk to try a new set of plates. I have eight plates at six inches (15cm) square, in which I’ve been experimenting with different methods of mark-making and ways of applying texture. In many ways, they take some of the techniques I’ve used previously, but applied in miniature, such as poured varnishes, sculpted interior filler, stuck raffia and string, plastic fruit bag netting and crackle paste.
As before, I began with preparing the basic plates, shown below. These are not made from my usual mount board material. Instead, I’ve used beech plywood. I can really recommend it. It’s only around 1mm thick, but much more stable and robust than mount board. The only thing I can’t easily do with it is to slice into it and peel away the surface, as with mount board. I ordered it from my local timber yard and they had to source it from one of their regional depots, so it took around a week to arrive. Bear this in mind if you decide to try it.
Instead of my usual interior varnish, I sealed the plates on both sides with yacht varnish. A fellow printmaker suggested that it would form a better, harder seal that would be easier to wipe once dry and hardened. This takes a lot longer (around 2-3 days), but hopefully will be worth it.
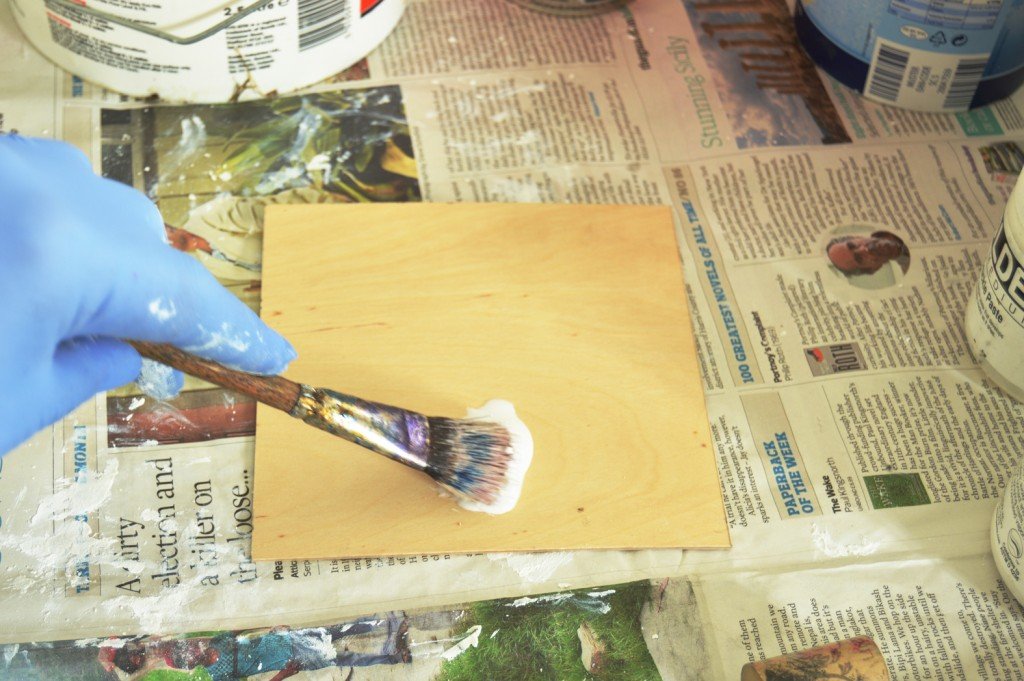

Beech plywood plates, coated with yacht varnish
For the first plate in the series, I decided that I wanted to do something with poured varnish and a dark background. This would involve coating the plate with carborundum powder to give me that background at the printing stage. So, once the varnish was dry, I sprayed the plate on one print side with adhesive and sprinkled it with carborundum powder. Alternatively, PVA adhesive can be used, but spraying is quicker. I try to be as careful as I can with this, by making sure that the garage that I use is well ventilated.
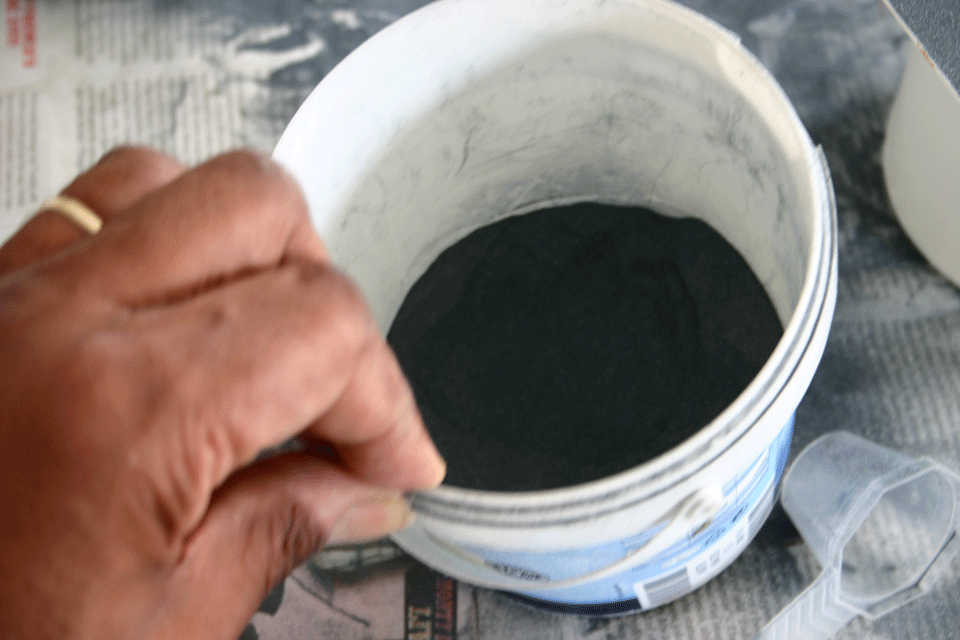
Sprinkling carborundum powder through a fine mesh bag

Once dried, the coated plate looks like this (above)


I poured varnish across the plate (above). Immediately, I used a small hair dryer to blister and spread the varnish until something interesting started to happen. I also made an instant decision to cut a channel diagonally across the plate. I had in mind an idea to perhaps print the channel area with a different colour, or perhaps some kind of highlighting treatment after printing.

Here’s the completed plate after finishing with another coat of yacht varnish. Hopefully there will be sufficient differences between the rougher carborundum and smoother poured varnish areas to produce some interesting tones in the print. I’m now intending to print more multi-coloured prints, so it will be interesting to see what happens, starting with this one!
Find all my posts about Art Printworks stories on Twitter at: #artprintstories